Mini-Split Installation In Jersey Village, Cypress, Katy, TX, and Surrounding Areas
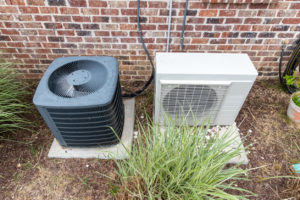
Ductless mini-split air conditioners feature two essential parts: an inside air-handling unit (the evaporator), which houses the refrigerant tubing, condensate drain, and suction tubing, and an outdoor condenser, which houses the compressor and can heat and cool your home. These intricate parts are one of the reasons that mini-split installation should be left to the professionals. We also provide other HVAC-related services with HVAC contractors in Jersey Village, TX, our professional team will assist you. Contact us today!

Advantages of Expert Mini-Split AC Installation
- Increased Security: HVAC specialists can perform effectively with electricity, circuit breakers, and other electrified equipment.
- Greater Mental Calm: You may rest easy knowing that the services are professional and have a solid track record.
- Prolonged System Life: Your home’s HVAC system uses potentially dangerous chemicals to keep it at the right temperature. It is a wise option to hire a professional to install your ductless system if you are not a qualified professional. At Fintastic Cooling and Heating, we provide top-notch AC installation in Hedwig Village, TX with our specialist team.
Installing A Mini-Split Air Conditioner: The Steps
- Holding the mounting bracket against the wall while leveling it, mark the locations of the screw holes and the sites for drilling holes for the electrical cable, condensate discharge line, and refrigeration lines.
- Create a hole in the block wall from the interior using a rotary hammer and a 3-inch masonry coring bit. Finish boring the hole from the outside once the bit’s pilot has reached the exterior of the wall.
- Make sure the wall is level before screwing the mounting bracket in place.
- Install the air conditioning unit on the bracket that is mounted to the wall. Through the opening in the wall, insert the condensate discharge line and refrigeration lines.
- The condensate discharge line, refrigeration lines, and electrical wire will be housed in the vertical chase attached immediately beneath the hole in the outside wall.
- Attach a section of PVC pipe to the condensate discharge line to extend it down to a few inches from the ground. Using duct tape, fasten the discharge line to the pipe.
- By screwing on a metal C-clamp, the lower section of the pipe is secured to the chase.
- The copper refrigeration lines should be carefully bent into the chase.
- Hold the flared end of the tubing against the air conditioner’s refrigeration line. To secure the copper tubing to the refrigerator line, manually tighten the nut. Repeat the process to connect the last refrigerant line.
- Place the outdoor condenser on a flat pad close to the pursuit.
- Use adjustable wrenches to tighten the compression fittings on the refrigerant lines. Then, encircle each line with pipe insulation.
- From an outdoor electrical box, run a weather-tight conduit to the condenser.
- Electrical cables should be fed through the conduit.
- Connect the indoor air conditioning unit to the condenser unit by running the length of the nonmetallic electrical cable through the wall hole.
- Hap the cover onto the pursuit to hide and safeguard the wires and cable.
- Complete all electrical connections at the air conditioner and condenser before nitrogen pressure testing the system at 300 pounds per square inch.
- Remove the nitrogen by vacuum, and then open the valves to let the refrigerant flow into the system.
- Test the air conditioner by turning on the electricity.
In a word, HVAC equipment is intricate; thus, it is best to put it in the hands of professionals for better maintenance. Our professionals at Fintastic Cooling and Heating can assist if you need a qualified technician for a qualified mini-split installation. Call us to schedule a professional repair or maintenance service.


